
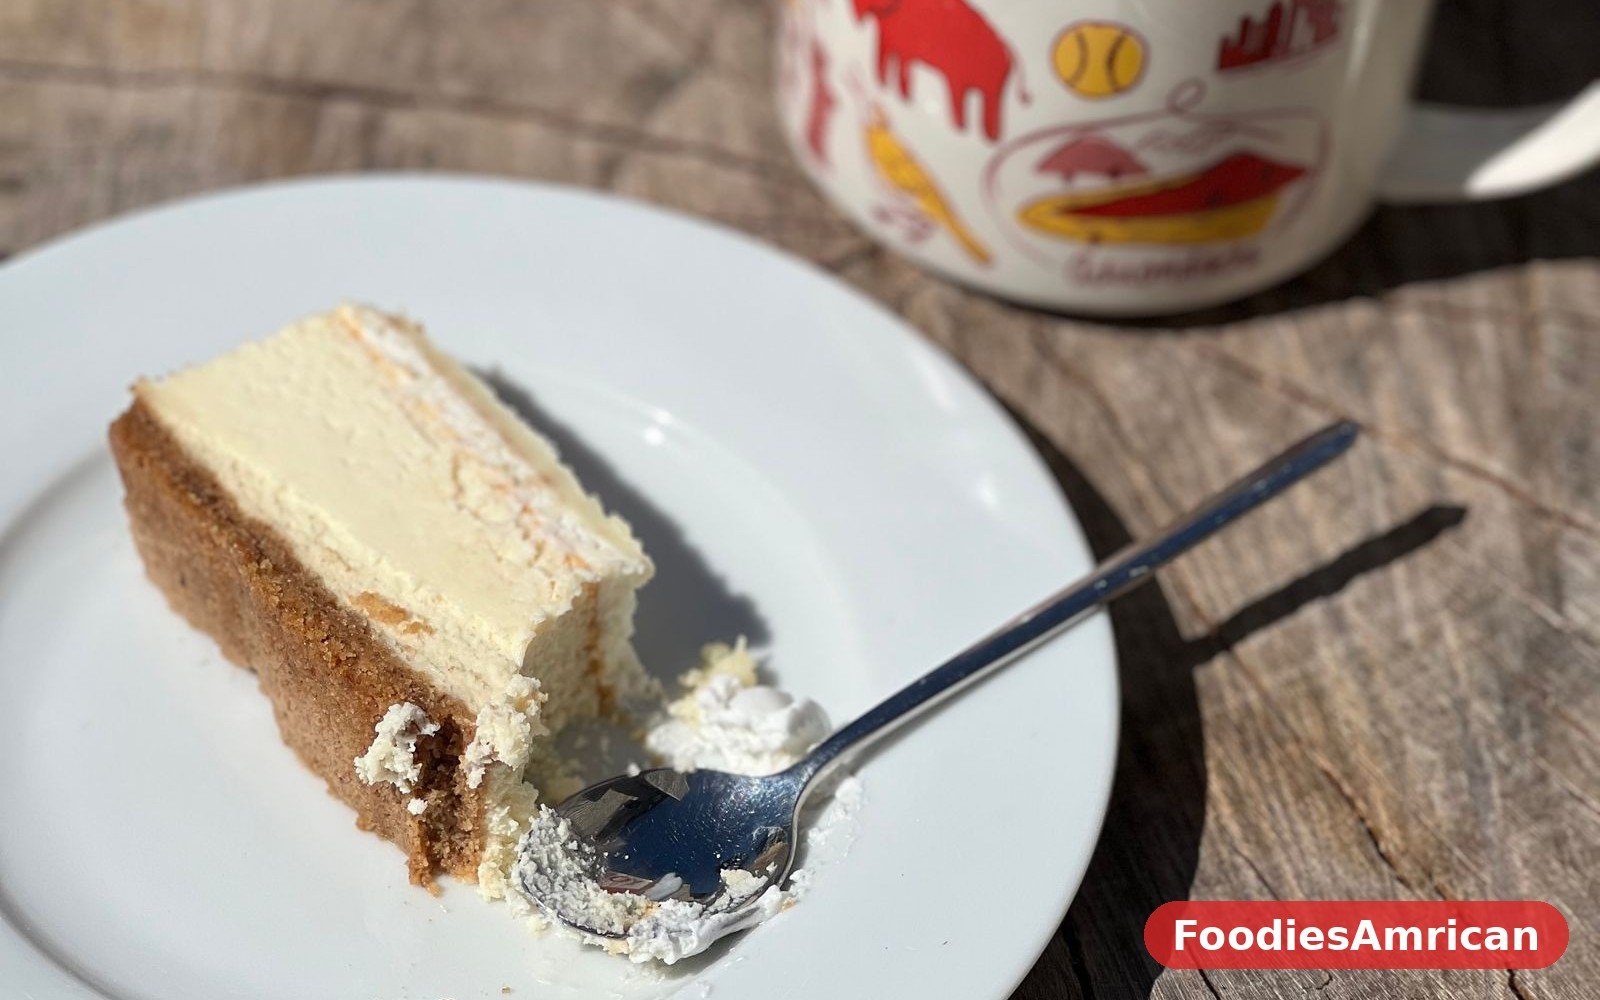
Classic New York Cheesecake
There is a moment, right when you slide the knife into a properly made New York cheesecake, when you know whether you got it right. The blade should glide through cleanly, and the slice should stand tall on the plate with a smooth, ivory face and a buttery crust along the bottom, dense enough to hold its shape and creamy enough to melt on your tongue. It is not a light dessert and it is not supposed to be. It is rich, cool, and deeply satisfying, the kind of dessert that makes a whole table go quiet for a minute.
New York cheesecake earned its name the honest way, by being the version that everyone else gets compared to. The story usually starts with Arnold Reuben, the New York delicatessen owner whose restaurant served a cheesecake so good that it became the standard for the whole city, and from there the style spread to every bakery and diner in America. What sets it apart is the filling: cream cheese, and lots of it, with eggs and a little sour cream or heavy cream, baked slowly until it is firm around the edges and just barely trembling in the center. No gelatin, no whipped topping, no shortcuts. Just cream cheese, treated with respect.
If cheesecake has a reputation for being difficult, it is mostly because the recipes people try first skip the steps that matter. A water bath sounds fussy until you see what it does, and room-temperature cream cheese sounds like a fussy detail until you taste the difference between a silky filling and a lumpy one. This recipe keeps all the steps that matter and explains why each one is there, and it leaves out the ones that do not. It is the cheesecake I make for birthdays, for holidays, and for the nights when only a real, classic dessert will do.
The best part is that almost all of the work is waiting. You mix the filling in about twenty minutes, you slide the pan into the oven, and then you wait while it bakes and cools and chills, and the waiting is what makes it perfect. Cheesecake is a dessert that rewards patience more than skill, and if you can follow a recipe and leave something alone in the fridge overnight, you can make a cheesecake that looks like it came from a bakery. It is the kind of recipe that turns an ordinary dinner into a celebration, and it is worth making from scratch at least once, because once you do, you will never go back to the boxed kind.
Why You’ll Love This Recipe
First, the texture is exactly right. This cheesecake is dense and creamy at the same time, firm enough to slice cleanly and soft enough to feel like it melts when you eat it. The secret is the combination of cream cheese and sour cream, with just enough eggs to set the filling without turning it rubbery, and a slow bake in a water bath that keeps the heat gentle and even. When you take a bite, it should be smooth all the way through, with no graininess and no lumps, and this recipe gets you there.
Second, it is simpler than its reputation suggests. There is no candy thermometer, no complicated technique, and nothing that requires a pastry degree. You crush the crackers, press the crust, beat the filling, pour it in, and bake it in a pan of hot water. That is the whole job, and every step is forgiving as long as you use room-temperature ingredients and do not overbeat the batter. If you have made a cake before, you can make this cheesecake.
Third, it is a make-ahead dream. Cheesecake actually needs to be made ahead, because it has to chill in the refrigerator for at least eight hours, and overnight is even better. That means you can bake it the day before a party, forget about it completely, and pull it out of the fridge the next day looking perfect, with no last-minute stress. It is the rare dessert that gets better when you plan ahead, and that makes it the easiest impressive dessert I know.
Finally, it is endlessly adaptable. The plain version is a classic for a reason, but it is also a blank canvas for whatever you love: fresh berries in the summer, a spoonful of cherry topping at the holidays, a drizzle of chocolate sauce for a birthday. The filling takes to all of it without a single change to the recipe, and that means one base recipe can carry you through a whole year of celebrations. If you are building a small collection of desserts you can count on, this cheesecake belongs next to a simple batch of small-batch chocolate chip cookies without mixer as one of the first recipes you learn by heart.
Ingredients You’ll Need
- 1 1/2 cups graham cracker crumbs, about 10 full sheets
- 1/4 cup granulated sugar, for the crust
- 5 tablespoons unsalted butter, melted
- 1/4 teaspoon salt, for the crust
- 4 packages (8 ounces each) full-fat cream cheese, at room temperature
- 1 1/4 cups granulated sugar, for the filling
- 1 cup sour cream, at room temperature
- 2/3 cup heavy cream
- 1 tablespoon all-purpose flour
- 1 tablespoon lemon juice, freshly squeezed
- 1 tablespoon vanilla extract
- 1/2 teaspoon fine sea salt, for the filling
- 5 large eggs, at room temperature
- Boiling water, for the water bath
- Fresh berries and whipped cream, for serving
How to Make Classic New York Cheesecake
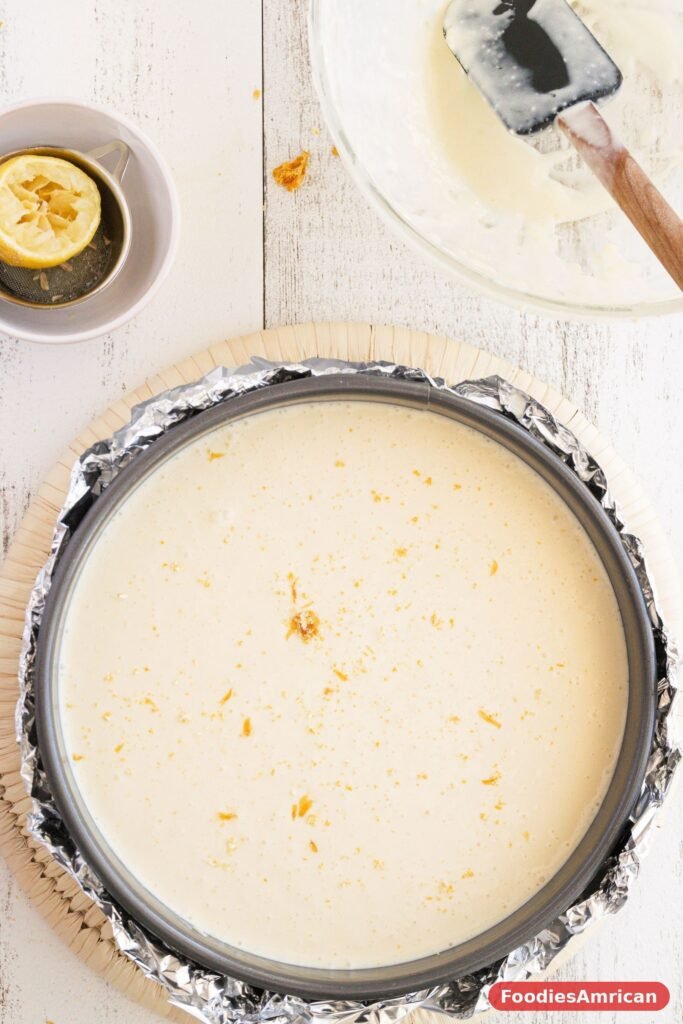
Start by heating the oven to 325 degrees Fahrenheit and getting the springform pan ready, because a little preparation here saves you trouble later. Take a 9-inch springform pan and wrap the outside tightly with two layers of heavy-duty aluminum foil, bringing the foil up the sides to keep water from seeping in during the bake. Then lightly grease the inside of the pan with butter or cooking spray, so the cheesecake releases cleanly when you are ready to unmold it. Set the pan on a baking sheet for now, and put a kettle of water on to boil, because you will need it for the water bath in a few minutes.
Make the crust by stirring the graham cracker crumbs, the sugar, and the salt together in a medium bowl, then pouring in the melted butter and stirring until the crumbs are evenly moistened and the mixture holds together when you squeeze a handful. It should look like damp sand, and it should clump easily in your fist. Tip the crumbs into the prepared pan and press them into an even layer across the bottom, then press them about an inch up the sides using the flat bottom of a measuring cup, which gives you a much smoother, more even crust than your fingers will. Bake the crust for ten minutes, until it smells toasty and looks just a shade darker, then set it aside to cool while you make the filling.
For the filling, put the cream cheese in the bowl of a stand mixer fitted with the paddle attachment, or in a large bowl with a hand mixer, and beat it on medium speed for about two minutes until it is completely smooth and creamy, with no lumps at all. Scrape down the sides of the bowl and the paddle, because cream cheese loves to hide in lumps along the edges, and beat it for another minute until it looks like thick, smooth frosting. This step matters more than any other in the recipe, because if the cream cheese is not perfectly smooth now, the finished cheesecake will not be either, no matter what you do later.
Add the sugar and beat on medium-low speed until it is fully mixed in, about a minute, then add the sour cream, the heavy cream, the flour, the lemon juice, the vanilla, and the salt, and beat on low speed just until everything is combined and the batter looks smooth and pale. The lemon juice is a quiet hero here: it brightens the flavor and cuts through the richness just enough to keep the cheesecake from tasting heavy, and you will not taste lemon in the finished cake, only a clean, fresh finish. Scrape the bowl down again and give the batter a final few turns with a spatula, making sure there are no streaks of cream cheese hiding near the bottom.
Now add the eggs, one at a time, beating on low speed after each one just until the yolk disappears into the batter. This is the step where patience matters most, because overbeating the eggs whips air into the batter, and air is what causes cheesecake to puff up in the oven and then sink and crack as it cools. Keep the mixer on low, add each egg slowly, and stop as soon as it is mixed in. The batter should be thick, smooth, and glossy, and it should fall off the spatula in slow ribbons. Give it a final gentle stir by hand to pop any big bubbles on the surface.
Pour the batter over the cooled crust and smooth the top with a spatula, then tap the pan firmly on the counter two or three times to bring any air bubbles to the surface. Set the foil-wrapped pan inside a large roasting pan and slide the whole thing onto the oven rack, then carefully pour boiling water into the roasting pan until it comes about halfway up the sides of the springform pan. The water bath is what makes this a New York cheesecake instead of a cracked, sunken one, because it keeps the oven heat gentle and humid, so the filling bakes slowly and evenly from the edges to the center. Bake for one hour and fifteen minutes, until the edges are set and the center still wobbles gently when you nudge the pan, like a firm jelly.
Turn the oven off, crack the door open a couple of inches, and leave the cheesecake in the oven for a full hour to cool down slowly, because a sudden temperature change is the most common cause of cracks. Then lift the pan out of the water bath, remove the foil, and let the cheesecake cool completely on the counter for another hour before covering it loosely with plastic wrap and sliding it into the refrigerator. It needs at least eight hours in the fridge, and overnight is better, because the cold is what sets the filling to that perfect, dense, creamy texture. When you are ready to serve, run a thin knife around the inside of the pan, release the springform ring, and slice the cake with a long, sharp knife dipped in hot water and wiped clean between cuts, which gives you those beautiful, clean slices. A slice of this with a cup of coffee after a cozy dinner is the perfect ending, and if you need a dinner to go before it, these easy American dinner recipes for two make a lovely, simple meal for a quiet evening.
Tips for the Best New York Cheesecake
Room-temperature ingredients are not a suggestion in this recipe, they are the whole game. Cold cream cheese will not beat smooth no matter how long you mix it, and cold eggs will stiffen the batter and leave little lumps that never bake out. Set the cream cheese, the sour cream, and the eggs on the counter at least an hour before you start, and if you forgot, you can hurry the cream cheese along by unwrapping it and microwaving it in ten-second bursts, and warm the eggs by setting them in a bowl of warm water for ten minutes. It is a small bit of planning that makes the difference between a silky filling and a lumpy one.
Do not overbeat the batter once the eggs go in, and I cannot say this strongly enough. The mixer should stay on low, the eggs should go in one at a time, and you should stop the moment each one disappears. Every extra minute of beating whips in air, and that air expands in the oven, lifts the cheesecake up like a soufflé, and then collapses as it cools, leaving cracks across the top. A dense, creamy cheesecake comes from a gently mixed batter, so treat the mixer like a helper, not a race.
Wrap the pan well, because a water bath is only helpful if the water stays outside the pan. Two layers of heavy-duty foil, wrapped tightly and brought high up the sides, will keep the crust dry in almost every case, and if your springform pan is older and the seal is not perfect, a large oven bag around the pan works even better. If a little water does get in, the crust will be soggy on the bottom, so it is worth taking the extra minute to wrap carefully. A dry crust is a crisp crust, and it matters, and if you want to see the method in action, Jenn Segal’s New York-style cheesecake uses the same water bath approach with a beautifully detailed walkthrough.
Cool the cheesecake slowly, because the cooling is just as important as the baking. The hour in the turned-off oven, the hour on the counter, and the overnight chill are not empty waiting time, they are the steps that let the filling set gently and evenly without cracking. If you rush it by putting a hot cheesecake straight into the fridge, the top can crack and the texture can turn rubbery. Patience is the cheapest ingredient in this recipe, and it is the one that pays off the most.
Variations to Try
For a strawberry-topped cheesecake, the classic diner version, spoon a can of cherry or strawberry pie filling over the chilled cheesecake right before serving, or make a quick fresh topping by simmering two cups of sliced strawberries with a quarter cup of sugar and a squeeze of lemon juice until the berries soften and the juices thicken. The bright, sweet fruit against the rich, tangy filling is one of the great dessert combinations, and it makes the plain cheesecake look like a celebration cake with almost no extra work.
For a chocolate swirl cheesecake, melt four ounces of semisweet chocolate and let it cool slightly, then drop spoonfuls of it over the batter in the pan and drag a knife through it in lazy figure-eights before baking. The chocolate marbles through the filling in beautiful ribbons, and every slice has a different pattern. If you love chocolate desserts in general, a rich classic chocolate layer cake is the next recipe to try after this one, and the two together cover just about any chocolate craving.
For a lemon cheesecake, add the zest of two lemons to the filling along with the juice, and top the finished cake with a thin layer of lemon curd. The citrus makes the whole dessert taste brighter and lighter, and it is especially lovely in the spring and summer when lemons are at their best. You can also try a caramel pecan topping, made by warming a cup of caramel sauce with a cup of toasted pecans and spooning it over the chilled cake, which turns the cheesecake into something that tastes like a fancy restaurant dessert.
For a lighter, no-bake version for hot summer days, you can skip the oven entirely by beating the same filling with a little gelatin and pouring it over the same crust, then chilling it until firm. It will be softer and lighter than the baked version, more like a mousse than a classic New York cheesecake, but it is delicious in its own right and it never turns on the oven. Keep the baked version for the holidays and the no-bake one for July, and you will have cheesecake all year round.
Serving Ideas
The simplest way to serve New York cheesecake is also the best: a clean slice on a cold plate, with nothing on it at all, so the creamy filling and the buttery crust can speak for themselves. It is a dessert that does not need decoration, and a plain slice with a cup of coffee or a glass of dessert wine is the way it has been served in New York delis for a hundred years. Let the cheesecake be the star, and keep everything else quiet around it.
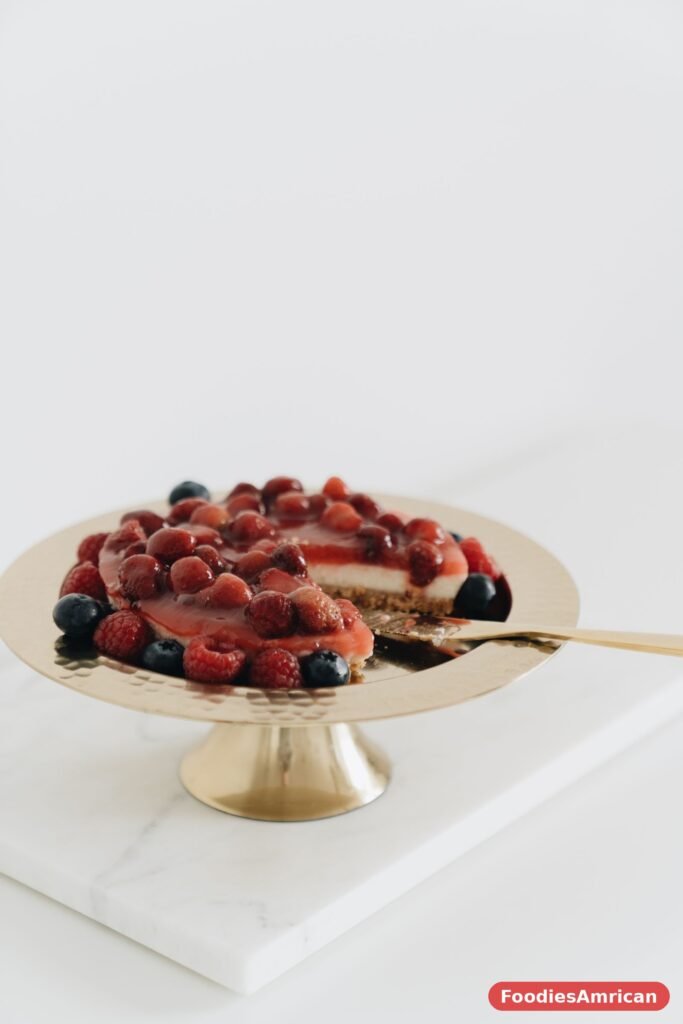
Fresh berries are the classic topping for a reason. A handful of raspberries, a few sliced strawberries, or a scattering of blueberries adds color, a little tartness, and a fresh, juicy contrast to the rich filling, and it makes the plate look like a restaurant dessert with no effort at all. A light dusting of powdered sugar over the berries, or a small dollop of softly whipped cream on the side, finishes the plate without overwhelming it.
For a more dressed-up presentation, warm a jar of cherry or blueberry pie filling and spoon it over each slice, or drizzle the plate with a little chocolate sauce and a spoonful of salted caramel. A thin slice of cheesecake with a warm fruit compote is wonderful after a heavy holiday meal, because the fruit cuts the richness and the warm topping against the cold cake is a lovely contrast. However you serve it, slice it with a hot, clean knife and serve it cold, straight from the refrigerator, because cheesecake is at its best when it is properly chilled and the filling is firm and creamy, and it makes a perfect ending to a cozy, comforting dinner like the ones in this collection of American comfort food recipes for beginners.
Storage and Reheating
Cheesecake keeps beautifully in the refrigerator for up to five days, which is one of the reasons it is such a good party dessert. Keep it in the springform pan with the ring still on, covered loosely with plastic wrap, or transfer slices to an airtight container with a sheet of parchment between the layers. It tastes even better on the second day, once the flavors have settled and the texture has firmed up completely, so do not worry about making it too far ahead.
To freeze cheesecake, chill it completely first, then slice it and wrap each slice tightly in plastic wrap, followed by a layer of aluminum foil, and tuck the wrapped slices into a freezer bag. It will keep for up to three months, and you can thaw a slice in the refrigerator overnight or on the counter for about an hour. Frozen cheesecake slices are a wonderful thing to have on hand, because a single slice thawed for an unexpected guest makes you look like a hero with no work at all.
Do not reheat cheesecake, because it is meant to be served cold, and warming it will soften the filling and ruin the texture. If you take it out of the fridge too early and it softens at room temperature, just put it back in the fridge for an hour and it will firm up again. Serve it cold, slice it with a hot knife, and store any leftovers promptly in the refrigerator, because the filling is made with dairy and eggs and should not sit out for more than two hours.
Frequently Asked Questions
Why did my cheesecake crack?
Cracks usually come from overbaking, overbeating the batter, or cooling too quickly. The most common cause is baking until the center is completely firm, when it should still wobble gently when you take it out. Overbeating whips air into the batter that expands and then collapses, and a sudden temperature change during cooling can crack the surface too. A slow cool in the turned-off oven, followed by a gentle chill, prevents most cracks, and a topping of fruit or whipped cream hides any small ones that do appear.
Do I really need a water bath?
For a classic New York cheesecake, yes, and it is worth the small effort. The water bath keeps the oven temperature gentle and humid, which lets the filling bake evenly without drying out or cracking. Without it, the edges can overcook while the center is still raw, and the top is far more likely to crack. If you truly cannot use a water bath, bake the cheesecake at a lower temperature, around 300 degrees, and place a pan of hot water on the rack below it, which gives you some of the same benefit, and Natasha’s Kitchen cheesecake recipe is another good example of the water bath method done well.
Can I use low-fat cream cheese?
You can, but the texture will not be the same. Full-fat cream cheese is what gives New York cheesecake its dense, creamy richness, and low-fat versions have more water and stabilizers, which can make the filling softer and slightly grainy. If you want a lighter cheesecake, it is better to use full-fat cream cheese and serve smaller slices than to swap in a low-fat version and lose the texture that makes this dessert special.
How do I know when the cheesecake is done?
The edges should be set and slightly puffed, and the center, about two to three inches across, should still wobble gently when you nudge the pan, like a firm jelly. It will look underdone, and that is correct, because the filling continues to set as it cools. If the whole surface ripples like liquid, it needs more time, but if the center is completely firm, it is already overbaked. Trust the wobble, and take it out.
Can I make cheesecake without a springform pan?
A springform pan is the right tool for this job, because it lets you unmold the cheesecake without flipping it, which would ruin the crust and the top. If you do not have one, you can bake it in a deep 9-inch cake pan lined with parchment paper, but you will need to serve it from the pan rather than unmolding it, and slicing will be trickier. A springform pan is an inexpensive investment if you plan to make cheesecake more than once, and it makes the whole process easier.
How long does cheesecake need to chill?
At least eight hours, and overnight is even better. The long chill is what sets the filling to the proper dense, creamy texture, and a cheesecake cut too soon will be soft and may not hold its shape. If you are in a hurry, six hours is the absolute minimum, but the texture will not be quite as good. Plan to bake it the day before you need it, and you will never be disappointed.


2 Comments