
Old-Fashioned Apple Pie
If there is one dessert that can end an argument about what American food really is, it is apple pie. It has been the shorthand for home, for comfort, and for the kind of cooking that takes time because it is worth taking time over, for so long that the phrase itself has become part of the language. And yet, for all that reputation, a truly good apple pie is not hard to make. It is a flaky, buttery crust, a pile of apples that hold their shape, and a filling that is sweet and spiced without being syrupy, and if you get those three things right, you have a pie that people will remember.
The apples are where a good pie starts, and the choice matters more than most recipes admit. You want apples that stay firm when they bake, so the filling has texture instead of turning into applesauce, and you want a mix of sweet and tart, so the filling has some brightness to it. Granny Smith apples are the classic choice for their tartness and their firmness, and mixing them with Honeycrisp or Braeburn gives you sweetness and a wonderful, tender bite. A pie made from a single variety can be good, but a pie made from two or three is always more interesting, and it is worth the extra trip to the produce aisle.
The crust is the other half of the story, and it is the part that scares people away from making pie at home. It should not. A good pie crust is just flour, butter, salt, and cold water, mixed gently and rolled out with a little patience, and this recipe walks you through it step by step. The secret is keeping everything cold, because cold butter in the dough turns to steam in the oven and lifts the crust into those flaky layers that shatter a little when you cut into them. Once you have made a crust from scratch, you will never be satisfied with the store-bought kind again.
This is the pie I make when the first apples of the fall show up at the market, and it is the pie I make for Thanksgiving, for birthdays, and for the nights when the house needs to smell like cinnamon and butter. It takes a little time, most of it just waiting for the dough to chill, but none of it is difficult, and the reward is a pie that comes out of the oven tall and golden, with the filling bubbling up through the vents and the crust crackling as it cools. Serve it warm with a scoop of vanilla ice cream, and you will understand why this dessert has lasted for centuries.
Why You’ll Love This Recipe
First, the crust is genuinely flaky, and that is the thing that separates a homemade pie from a store-bought one. The butter is cut into the flour in small, pea-sized pieces, and those pieces melt in the hot oven and leave behind tiny pockets of air, which is what makes the crust shatter and flake instead of turning tough and dense. When you cut a slice and the crust crackles a little under the knife, you will know you got it right, and you will never want to go back to a crust from a box.
Second, the filling is the right balance of sweet and tart, with apples that stay in slices instead of collapsing into mush. The sugar is measured to let the apples taste like apples, not like candy, and the cinnamon, nutmeg, and lemon juice give the filling warmth and brightness without overwhelming it. A spoonful of flour thickens the juices just enough that the filling holds together when you slice the pie, instead of running all over the plate, and that is the difference between a beautiful slice and a soupy mess.
Third, this recipe is honest about the time it takes and does not ask you to do anything fussy. The dough needs to chill, and the pie needs to cool, and those are the two longest waits in the whole process, but the active work is under an hour. You can make the dough the night before, assemble the pie in the morning, and have it ready for dessert that night, which makes it a practical recipe for a holiday when the kitchen is already busy with a dozen other things.
Finally, it is the most versatile dessert you can learn. Once you know how to make a double crust and a fruit filling, you can make cherry pie in the summer, peach pie when the peaches are ripe, and pumpkin pie at Thanksgiving, all with the same basic skills. Apple pie is the gateway to all of it, and it is the one people will ask you to make again and again. If you are building a small collection of desserts you can count on, this pie belongs next to a simple batch of small-batch chocolate chip cookies without mixer as one of the first recipes you truly learn.
Ingredients You’ll Need
- 2 1/2 cups all-purpose flour, plus more for rolling
- 1 teaspoon fine sea salt
- 1 tablespoon granulated sugar, for the crust
- 1 cup unsalted butter, very cold and cut into small cubes
- 6 to 8 tablespoons ice water
- 3 pounds apples, about 7 medium, a mix of Granny Smith and Honeycrisp
- 3/4 cup granulated sugar, for the filling
- 1/4 cup light brown sugar, packed
- 3 tablespoons all-purpose flour, for the filling
- 1 tablespoon lemon juice, freshly squeezed
- 1 1/2 teaspoons ground cinnamon
- 1/4 teaspoon ground nutmeg
- 1/4 teaspoon ground allspice
- 1/4 teaspoon fine sea salt, for the filling
- 1 tablespoon unsalted butter, cut into small pieces, for dotting the filling
- 1 large egg, beaten with 1 tablespoon milk, for the egg wash
- 1 tablespoon coarse sugar, for sprinkling
How to Make Old-Fashioned Apple Pie
Start with the crust, because it needs time in the refrigerator before you can roll it out. Whisk the flour, the salt, and the sugar together in a large bowl, then scatter the cold butter cubes over the top and cut them into the flour using a pastry cutter or two knives, until the mixture looks like coarse crumbs with pea-sized pieces of butter still visible throughout. Those little pieces of butter are the whole secret of a flaky crust, so do not work the dough until they disappear. You want to see them, because they are what will turn into steam in the oven and lift the crust into layers.
Sprinkle the ice water over the mixture one tablespoon at a time, stirring gently with a fork after each addition, until the dough just starts to come together in shaggy clumps. You may not need all eight tablespoons, and that is fine, because the right amount depends on your flour and your kitchen, so add the water slowly and stop when the dough holds together when you squeeze a handful. Gather the dough into a ball, divide it in half, and flatten each half into a disk about an inch thick. Wrap both disks tightly in plastic wrap and refrigerate them for at least an hour, or overnight if you are making the dough ahead.
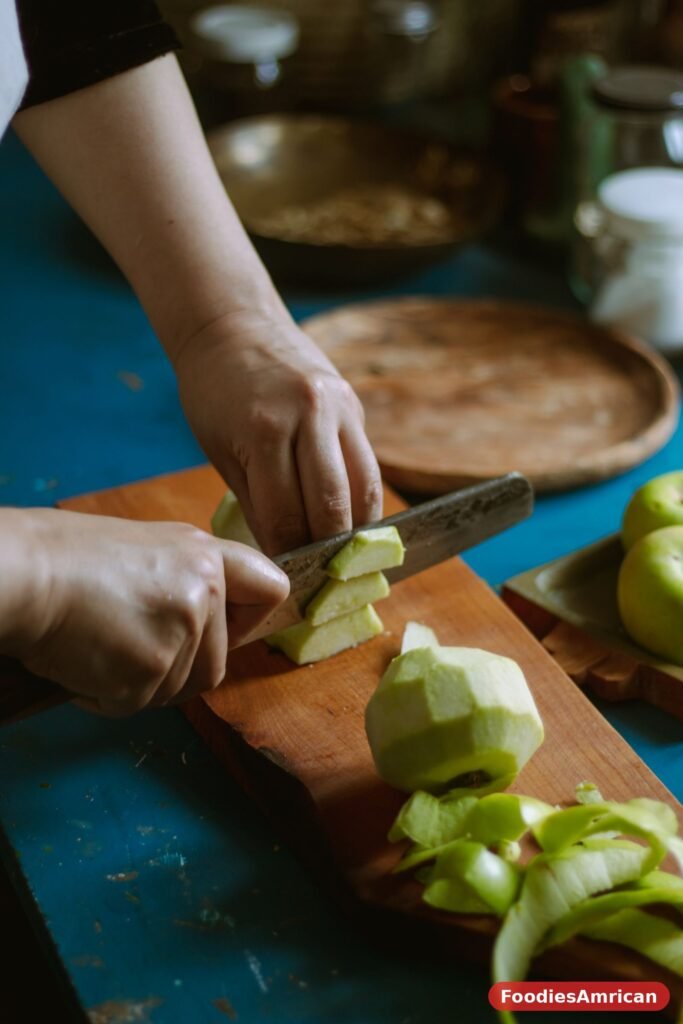
While the dough chills, make the filling. Peel the apples, cut them into quarters, and slice them into pieces about a quarter of an inch thick, and put them in the biggest bowl you have. The slices should be thin enough to cook through in the oven but thick enough to hold their shape, so aim for even slices and do not worry if they are not perfect. Toss the apples with the lemon juice first, which keeps them from browning and adds a bright note to the filling, then add the granulated sugar, the brown sugar, the flour, the cinnamon, the nutmeg, the allspice, and the salt, and toss everything together until the apples are evenly coated. Let the filling sit for twenty minutes, which gives the sugar time to draw out the apple juices and lets the flour start to thicken them.
When the dough has chilled, take one disk out of the refrigerator and let it sit on the counter for five minutes, just long enough to soften slightly so it does not crack when you roll it. On a lightly floured surface, roll it out into a circle about twelve inches across, turning the dough a quarter turn after every few rolls and dusting with a little more flour if it starts to stick. Gently lift the dough by rolling it loosely around the rolling pin, then unroll it over a 9-inch pie dish and press it lightly into the bottom and the sides, leaving the excess hanging over the edge.
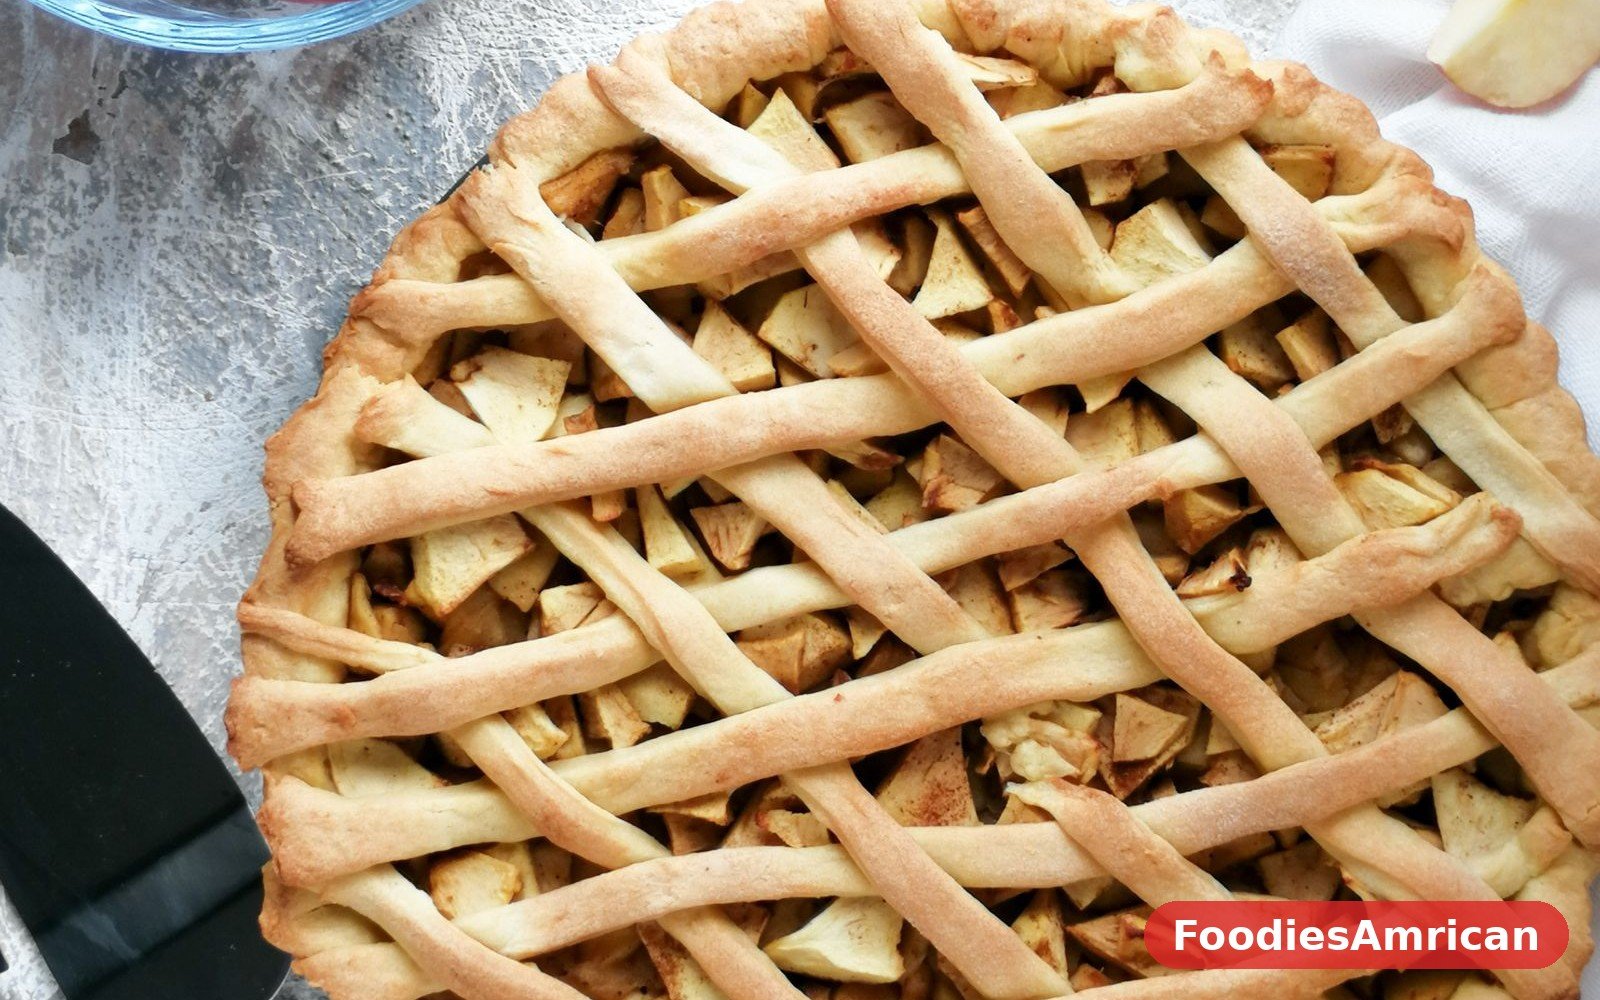
Spoon the apple filling into the crust, mounding it slightly higher in the center, because the apples will shrink as they bake and a flat filling ends up with a gap under the top crust. Dot the top of the filling with the small pieces of butter, which melt into the apples and add richness to the juices. Now roll out the second disk of dough the same way, and lay it over the top of the pie. If you want a lattice top, cut the dough into strips about an inch wide and weave them over the filling in a simple over-under pattern, which looks beautiful and lets the steam escape. For a full top crust, lay the whole circle over the pie and cut four or five slits in the top with a sharp knife, so the steam has somewhere to go.
Trim the excess dough from both layers so about an inch hangs over the edge, then fold the top layer under the bottom layer and crimp the edges together with your fingers or the tines of a fork, which seals the pie and gives it that classic finished look. Brush the top crust with the egg wash, which is just an egg beaten with a tablespoon of milk, and sprinkle it with coarse sugar, which will bake into a sparkly, crackly sweetness. The egg wash is what gives the crust its deep golden color, and the sugar gives it a little crunch, so do not skip either one.
Set the pie on a baking sheet, because the filling will bubble and drip as it bakes, and slide it into an oven heated to 425 degrees Fahrenheit. Bake at that high temperature for twenty minutes, which sets the crust quickly and gets the bottom cooking before the filling can make it soggy, then turn the oven down to 375 degrees and bake for another forty to forty-five minutes, until the crust is deeply golden and the filling is bubbling thickly through the vents. If the edges start to brown too fast, cover them loosely with strips of foil or a pie shield, and let the center keep baking. The pie is done when the juices bubbling up through the vents look thick and syrupy rather than thin and watery, and the crust is a rich, even gold all over. This is the kind of patient, from-scratch baking that makes a whole meal feel special, and it is a lovely finish after a comforting dinner like these easy American dinner recipes with chicken breast.
Let the pie cool on a wire rack for at least three hours before you slice it, and I know that is the hardest part of this whole recipe. The filling is still setting as it cools, and if you cut into it too soon, the juices will run out and the slices will fall apart. Three hours gives the filling time to thicken properly, so the slices hold their shape and the apples stay in place. Serve it slightly warm or at room temperature, with a scoop of vanilla ice cream or a slice of sharp cheddar cheese, the old-fashioned way, and watch it disappear.
Tips for the Best Apple Pie
Keep everything cold, and I mean everything. The butter should be cold enough that it is hard to the touch, the water should have ice cubes floating in it, and if your kitchen is warm, you can even chill the flour and the bowl for half an hour before you start. Cold butter is what makes a flaky crust, because it stays in little pieces in the dough instead of melting into the flour, and those pieces turn to steam in the oven and lift the crust into layers. If the butter softens while you are working, put the whole bowl in the refrigerator for fifteen minutes and come back to it.
Choose your apples with care, because the variety makes a bigger difference than almost anything else in this recipe. Granny Smith apples are the backbone, because they are tart, firm, and they hold their shape beautifully, but a pie made only from Granny Smiths can taste a little sharp. Mixing them with Honeycrisp, Braeburn, or Jonagold adds sweetness and a more complex flavor, and the different textures make the filling more interesting. Ree Drummond’s apple pie uses the same kind of mixed-apple approach, and it is a good reminder that a blend of varieties beats a single one every time. Avoid Red Delicious and McIntosh for pie, because they turn soft and mushy in the oven and the filling loses all its structure.
Do not skip the resting time for the filling, because those twenty minutes do real work. The sugar draws the juices out of the apples, the flour mixes into those juices, and the whole filling starts to thicken before it ever goes into the oven. If you skip this step and put dry, sugary apples straight into the crust, the filling can end up watery at the bottom and dry at the top. Twenty minutes on the counter is all it takes, and you can use that time to roll out the dough.
Bake the pie long enough, because an underbaked apple pie is one of the most common disappointments in home baking. The apples need the full time to soften completely, and the filling needs to bubble thickly for several minutes before it is truly done. If you pull the pie out when the crust looks done but the filling is not bubbling, the apples will be crunchy and the juices will be thin. Trust the bubbling, not just the color, and if the crust is browning too fast, cover the edges with foil and let the pie keep baking.
Variations to Try
For a Dutch apple pie, skip the top crust entirely and top the filling with a crumb topping made from a cup of flour, a half cup of brown sugar, a teaspoon of cinnamon, and a half cup of cold butter cut into small pieces, mixed together until crumbly and piled generously over the apples. The crumb topping bakes into a sweet, crunchy layer that is wonderful with ice cream, and it is a little easier than rolling out a second crust, which makes it a good choice when you are short on time or patience.
For a caramel apple pie, drizzle a half cup of caramel sauce over the apples before you put the top crust on, and sprinkle a handful of chopped toasted pecans over the filling as well. The caramel melts into the apples as they bake and turns the juices into something rich and buttery, and the pecans add a lovely crunch. Serve it with vanilla ice cream and a little extra caramel sauce, and it tastes like the best caramel apple you ever had, only in pie form.
For a lattice-top pie with a little extra flair, weave the strips of dough over the filling in a classic over-under pattern, then brush the lattice with egg wash and sprinkle it with coarse sugar. The lattice looks beautiful, it lets the steam escape so the filling thickens properly, and it gives you those crisp, golden strips of crust in every bite. If you have never woven a lattice before, it is easier than it looks, and there are plenty of good videos that will show you the pattern in a minute.
For a cheddar-crust apple pie, the old New England tradition, stir a cup of finely shredded sharp cheddar cheese into the flour before you cut in the butter, and the crust bakes up with a savory, cheesy flavor that is wonderful against the sweet apples. It sounds unusual if you have never tried it, but the combination of sharp cheddar and sweet apple is a classic for a reason, and a slice of pie with cheese baked right into the crust is a revelation. You can also serve a plain apple pie with a slice of cheddar on the side, which is the same idea in a simpler form.
Serving Ideas
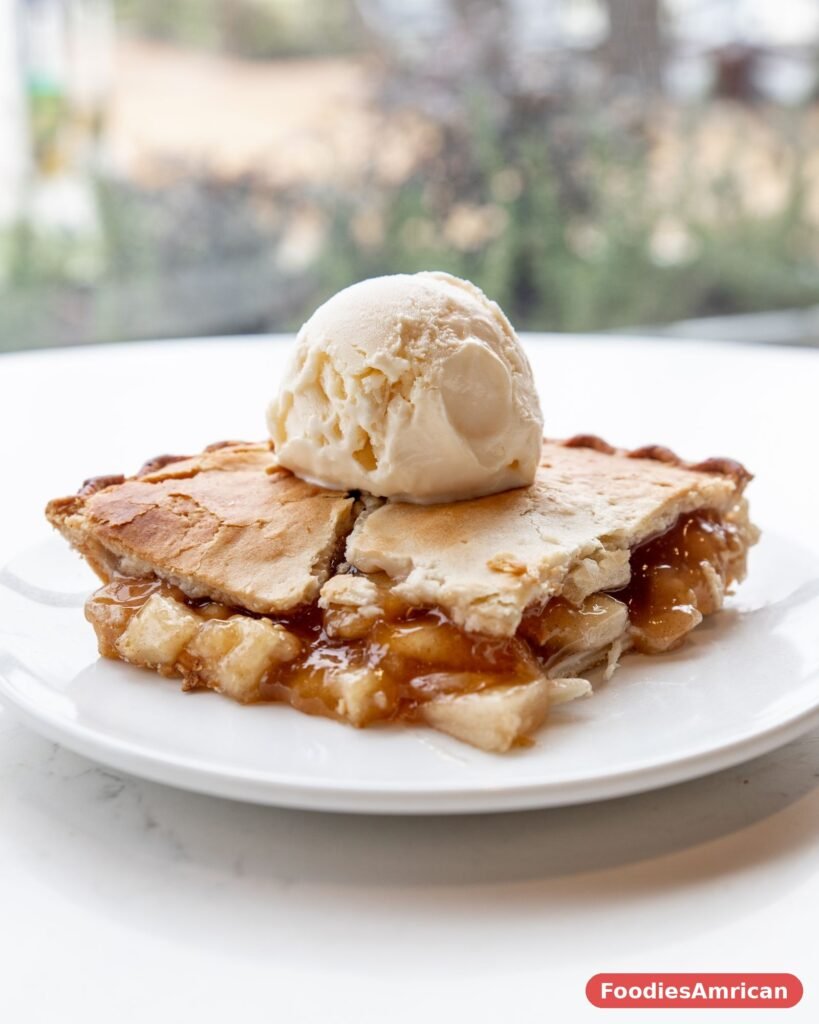
The classic way to serve apple pie is warm, with a scoop of vanilla ice cream melting slowly over the top, and there is a reason it has never gone out of style. The cold, creamy ice cream against the warm, spiced apples and the flaky crust is one of the great dessert combinations, and it turns a slice of pie into a proper occasion. Use good vanilla ice cream, the kind with real vanilla bean flecks in it, and let it sit on the counter for a few minutes so it scoops easily and melts just a little on the pie.
For the old-fashioned New England serving, try a slice of sharp cheddar cheese alongside the pie, or even melted right on top. The salty, sharp cheese against the sweet, spiced apples is a combination that has been loved for centuries, and it is especially good when the pie is served warm and the cheese softens slightly. It sounds strange the first time you hear about it, but one bite is usually enough to convert even the most skeptical eater, and it is a wonderful way to serve pie in the fall when the cheddar is at its best.
For a lighter finish, serve the pie at room temperature with a dollop of softly whipped cream, sweetened with just a little sugar and a drop of vanilla. The cream is lighter than ice cream and it lets the flavor of the apples come through more clearly, which is nice when the pie is the star of the meal. A warm mug of coffee or a glass of cold milk alongside is all you need, and the whole thing feels like the end of a good, honest dinner, the kind you might build around a cozy dish like this easy homemade chicken pot pie without crust, with a slice of Southern pecan pie waiting on the dessert table for anyone who wants a second helping.
Storage and Reheating
Apple pie keeps well at room temperature for up to two days if you cover it loosely with plastic wrap or foil, and it is best if you keep it in the pie dish rather than transferring slices to a container. The crust will soften a little as it sits, which is normal, and a few minutes in a warm oven will crisp it back up. After two days, move any leftovers to the refrigerator, where they will keep for up to five days, covered tightly so the filling does not dry out.
To reheat a slice, warm it in a 350-degree oven for ten to fifteen minutes, which brings back the crispness of the crust and warms the filling through without making it soggy. You can also reheat a slice in the microwave for thirty to forty seconds, which is faster but softens the crust, so save that for when you are in a hurry. A scoop of fresh ice cream on a reheated slice makes it taste like it just came out of the oven, and nobody will know the difference.
Apple pie freezes well, both baked and unbaked. To freeze a baked pie, let it cool completely, wrap it tightly in plastic wrap and then in foil, and freeze it for up to three months. Thaw it overnight in the refrigerator and reheat it in a 350-degree oven for twenty minutes. To freeze an unbaked pie, assemble it completely, wrap it the same way, and bake it straight from frozen at 425 degrees for twenty minutes, then at 375 degrees for another fifty to sixty minutes, until the filling is bubbling. Having a pie in the freezer is one of the best gifts you can give your future self.
Frequently Asked Questions
What are the best apples for apple pie?
A mix of tart and sweet apples works best. Granny Smith is the classic tart apple because it holds its shape and adds brightness, and Honeycrisp, Braeburn, Jonagold, or Golden Delicious add sweetness and a tender bite. Avoid apples that turn mushy when baked, like Red Delicious and McIntosh. Using two or three varieties gives the filling more flavor and a better texture than any single apple can, and BBC Good Food’s apple pie is another good reference for how the classic filling should come together.
Why is my apple pie filling runny?
A runny filling usually means the pie was underbaked, or the apples released more juice than the flour could thicken. Make sure the filling bubbles thickly through the vents for several minutes before you take the pie out, and let the pie cool for at least three hours so the filling can set. If your apples are very juicy, you can add an extra tablespoon of flour or a tablespoon of cornstarch to the filling, and tossing the apples with the sugar and letting them sit for twenty minutes before assembling helps too.
How do I keep the bottom crust from getting soggy?
Bake the pie on the lowest rack of the oven, or on a preheated baking stone or baking sheet, so the bottom gets the most heat. Starting the bake at a high temperature, 425 degrees for the first twenty minutes, helps set the bottom crust quickly before the filling can soak into it. You can also brush the bottom crust with a little beaten egg white before adding the filling, which creates a thin barrier, and make sure the filling is not too wet when it goes in.
Can I make apple pie ahead of time?
Yes, and it is one of the best make-ahead desserts. You can make the dough up to three days ahead and keep it in the refrigerator, or freeze it for up to three months. You can assemble the whole pie a day ahead and keep it covered in the refrigerator, then bake it when you are ready. A baked pie keeps at room temperature for two days or in the refrigerator for five, and it freezes beautifully for up to three months.
Should I peel the apples for apple pie?
Yes, peel them. The skins turn tough and chewy in the filling and they separate from the apple flesh as it bakes, which gives the filling a strange texture. Peeling takes a few minutes, but it is worth it.
Can I use store-bought pie crust?
You can, and there is no shame in it, especially on a busy holiday when the kitchen is already full. A store-bought crust will give you a decent pie, though it will not be as flaky or as buttery as a homemade one. If you use a store-bought crust, roll it out a little thinner, use it for the bottom and the top, and follow the rest of the recipe as written. The filling is the same either way, and a good filling can carry a store-bought crust a long way.


